
Coding Environment
The last post went into the hardware details for our audio project. In this post, we’re going to cover the coding environment. Aside from the basics, there are some neat features in the microcontroller that we definitely want to use and that’s going to need some extra configuration.
The extra configuration steps sent me on a bit of a wild goose chase throughout the internet so I hope that by compiling most of what I learned into one post, you can get started more quickly.
Here’s what we’re going to cover:
- Simplicity Studio IDE Introduction
- Creating a New Project
- Using EMLIB libraries
- Enabling FPU and CMSIS DSP Extensions
The instructions in this post assume that you are using MacOS. For Windows or Linux users, the setup steps should be fairly similar except for file paths and searching for dialog boxes.
Simplicity Studio
The IDE that we will be using is Silabs own Simplicity Studio – an IDE based on Eclipse. It’s free to download, cross-platform and is a pretty good way to get started using Silabs microcontrollers.
Once you’ve downloaded and installed Simplicity Studio, I highly encourage you to connect your dev board and play around with some of the example projects that Silabs provides.
For help in finding the examples, scroll down to the Extra Bits section of this post.
Creating a New Project
To create a new project, click File>New>Project..
This should create a popup that asks for you to select a setup wizard. Choose Silicon Labs MCU Project and click Next
The next step asks you which board you are using. Assuming that you are using the Pearl Gecko EFM32PG revision A01 dev board, select EFM32PG12 Pearl Gecko Starter Kit board (BRD2501A RevA01). The Part should automatically fill in once you choose your board.
For the SDK, choose the Gecko SDK Suite then click Next

The next step asks which type of project you want to create. Select Empty C Program then click Next.
The wizard then asks you to name your project and to specify a directory to store it. Do so and click Next.
The next step asks to specify build configurations. Leave everything as-is and click Finish.
EMLIB Library
EMLIB is a library provided by Silabs as part of the Gecko SDK that abstracts out a lot of the peripheral configurations and functionality into a set of convenient typedefs and functions. Documentation for the library can be found in the Silabs website
The EMLIB definitions are split into different source files, each corresponding to a different peripheral. Therefore, if you want to call an EMLIB function for the TIMER peripheral, you will need to manually import the em_timer.c source file into your project.
The source files can be found in:
/Applications/Simplicity\ Studio/Contents/Eclipse/developer/sdks/gecko_sdk_suite/v2.5/platform/emlib/srcThe best way that I found to import source files is to simply click and drag them from the SDK directory to the emlib folder in your project
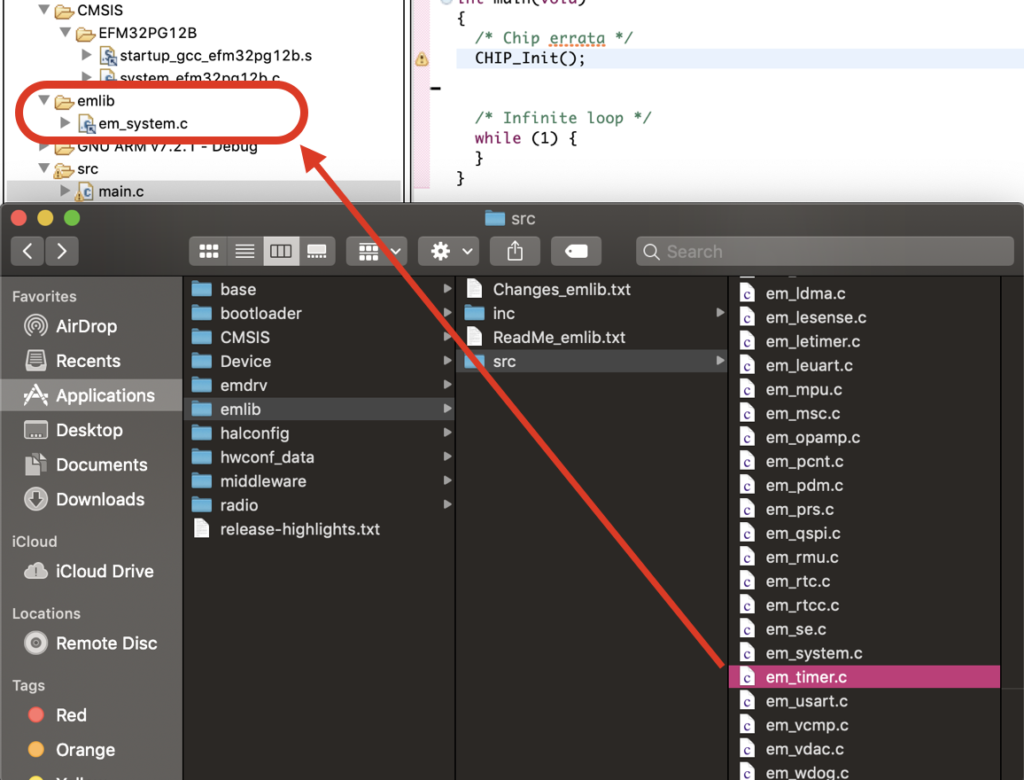
After dragging and dropping the source file, you may get a pop-up box asking if you want to make a copy of the source file or create a link to it. Simplicity Studio chooses creating a link by default.
Enabling the FPU and Using CMSIS DSP
The dev board microcontroller contains a floating point unit which will be immensely useful for audio processing as it accelerates floating point operations.
Programs that work with decimal numbers on microcontrollers without a dedicated FPU often either make use of libraries that perform floating point operations in software or use fixed point representation and arithmetic.
Silabs provides a nice application note on working with the DSP extensions which includes instructions for enabling the FPU.
Preprocessor Symbols
To start, you will need to add 2 preprocessor symbols. Right click on your project folder (in the Project Explorer) in Simplicity Studio and click Properties
Under C/C++ Build > Settings, navigate to Tool Settings > GNU ARM C Compiler > Symbols. Under Defined Symbols, add the following:
__FPU_PRESENT=1
ARM_MATH_CM4=1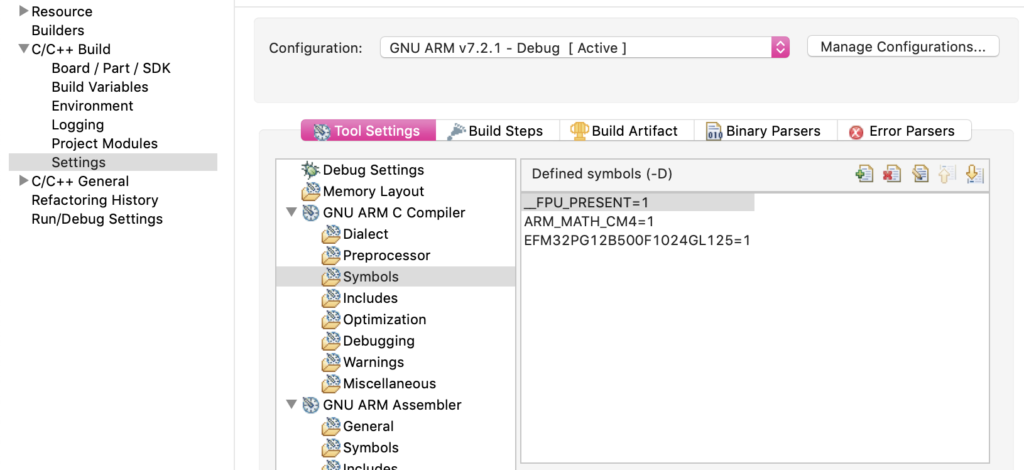
__FPU_PRESENT indicates that the program should be compiled with FPU specific instructions while ARM_MATH_CM4 indicates that we want to use the DSP extensions for the Cortex M4 processor.
Floating Point ABI
Under Tool Settings > GNU ARM C Compiler > Miscellaneous, ensure that Enable Hardware Floating Point is checked and the dropdown box is set to FPU-specific calling conventions (-mfloat-abi=hard)

You will need to do the same in the linker settings under Tool Settings > GNU ARM C Linker > General
In your linker settings, -mfloat-abi may need to be changed to soft or softfp depending on how your libraries were compiled.
Importing the CMSIS DSP Library
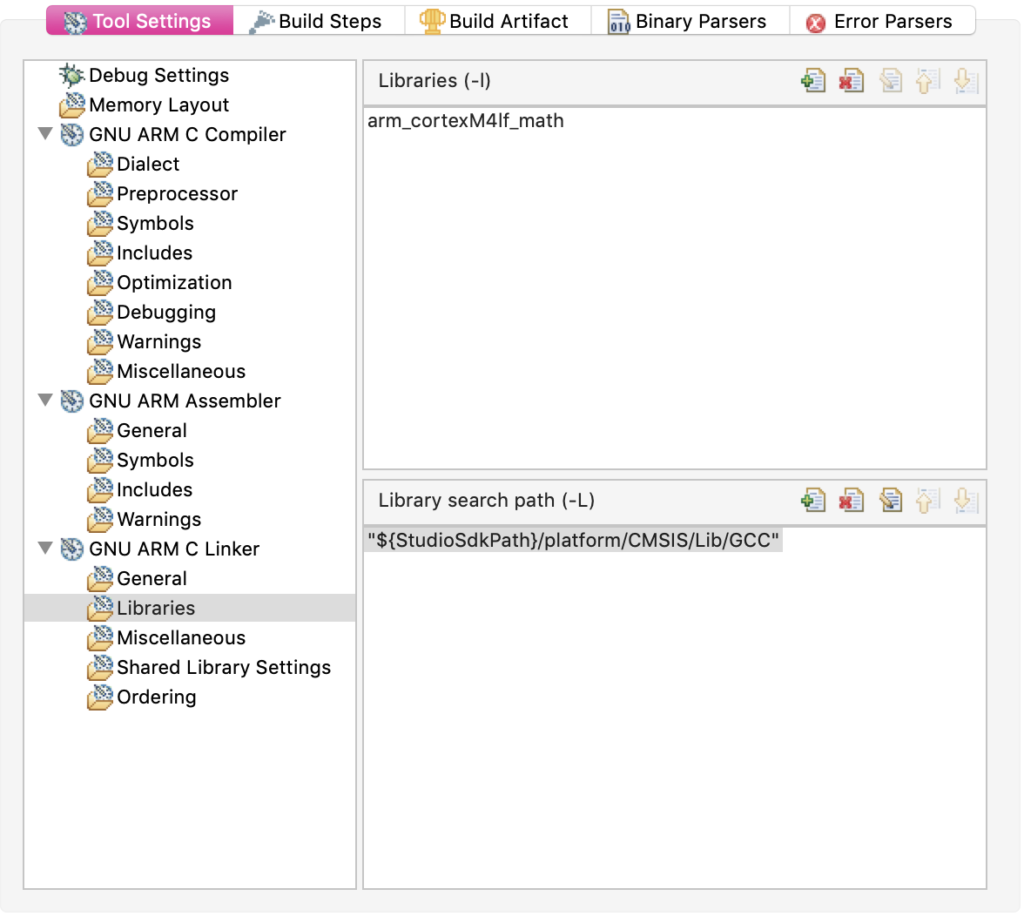
To use the CMSIS DSP library, you will need to import the library into your project. Under Tool Settings > GNU ARM C Linker > Libraries, add the library arm_cortexM4lf_math
In the Library search path, you will need to add the location of the DSP library which is:
"${StudioSdkPath}/platform/CMSIS/Lib/GCC"Make sure that you add the quotation marks in the search path.
Alternatively, you can manually import the math source files into your project (and find examples to boot) which can be found in:
/Applications/Simplicity\ Studio/Contents/Eclipse/developer/sdks/gecko_sdk_suite/v2.5/platform/CMSIS/DSP_Lib/SourceThe actual .a files can be found in the directory:
/Applications/Simplicity\ Studio/Contents/Eclipse/developer/sdks/gecko_sdk_suite/v2.5/platform/CMSIS/Lib/GCCIf you looked at the files in the above directory, you will notice that they are named something like libarm_cortexM4lf_math.a but only arm_cortexM4lf_math was entered into Eclipse. This is one of the linker’s small quirks. When specifying the library name, the lib and .a is left out.
Finally, to use the DSP extensions, you will need to add a couple of lines of code: one include statement and a function call:
#include "arm_math.h"  //  Include this to use CMSIS DSP functions

void main(){

  SystemInit();  //  Include this to enable FPU

  while(true){
    /* Usage Example */
    float32_t testArray[128];
    arm_fill_f32(0.0, testArray, 128)  //  Example CMSIS DSP function (vector fill)
    /*----------------*/

    //  Do other stuff here
  }
}
This should get you started with using the FPU and DSP calls. The documentation to the DSP library can be found in the Silabs documentation. The DSP extensions contain a lot of useful functions which we will be using in future examples.
In the next post, we are going to make use of what we learned so far and make a simple audio-pass through example.
Useful Links
- Simplicity Studio Download
- Simplicity Studio User Guide
- EMLIB Documentation
- ARM CMSIS DSP Documentation
- Silabs DSP Application Note
- Silabs FPU Enable Forum Post
- Removing lib and .a when Importing Libraries Forum Post
Extra Bits
Example Projects
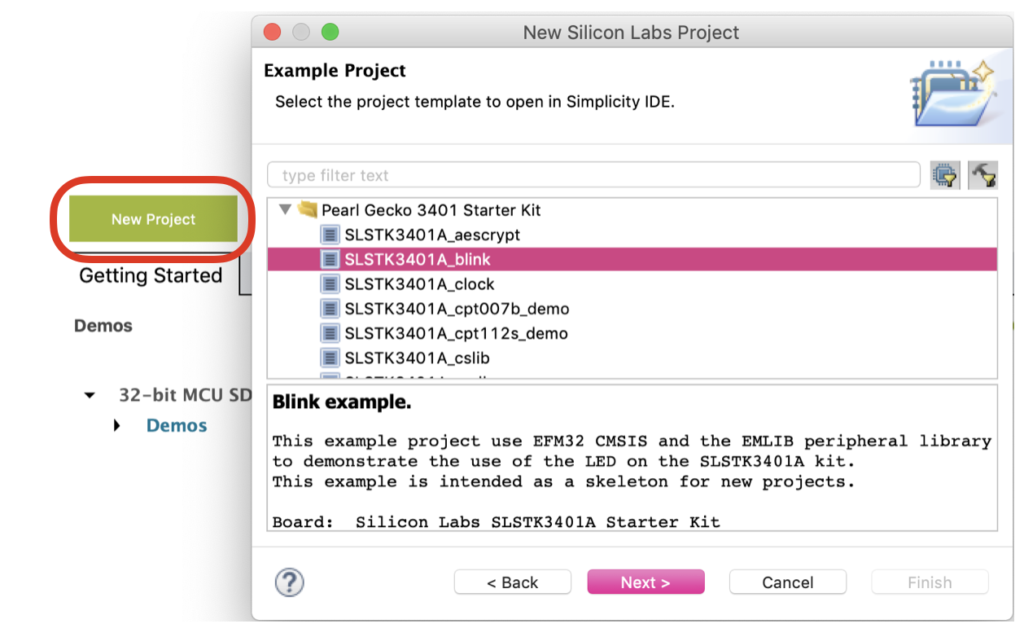
The Gecko SDK contains a number of example projects that you can load onto your dev board (including a fun space invaders game). To access these, you will need to be in the Simplicity Studio Launcher. You should be able to find the Launcher button on the top right corner:

Assuming you are using the EFM32 PG12 Pearl Gecko dev board, you will need to add this to the My Products tab so that Simplicity Studio can offer the examples specific to the dev board.
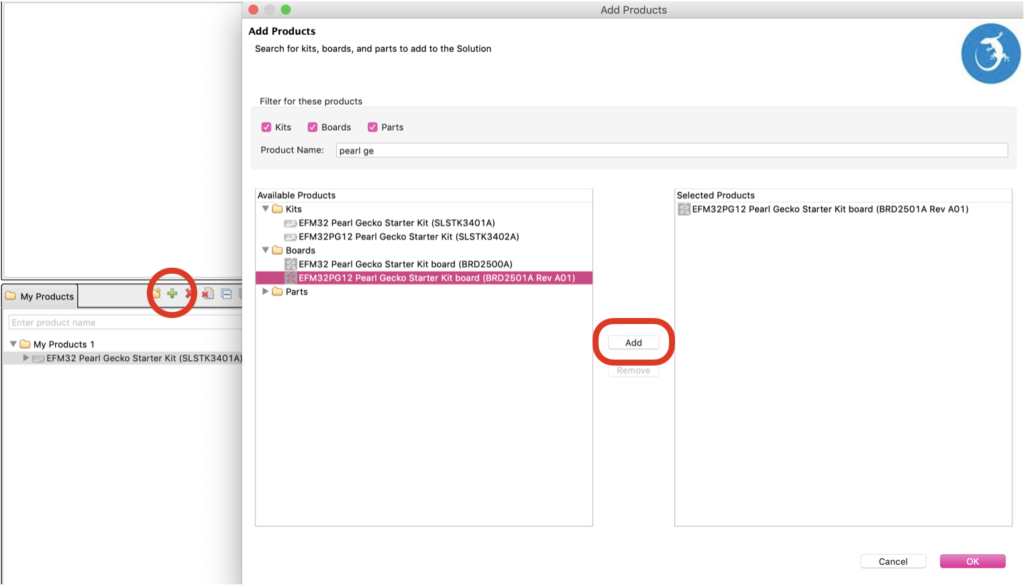
Once you’ve added your board, ensure that it is highlighted in My Products, then click New Project and a list of example projects should appear. Go through the wizard and enjoy.
Dev Board Documentation
Simplicity Studio also offers you the option to download dev board schematics, assembly diagrams and data sheets. Once you’ve added your board in My Products, navigate to the Documentation tab. Reference manuals, data sheets and schematics are available in All Documents
Once downloaded, reference manuals can be found in:
/Applications/Simplicity\ Studio.app/Contents/Eclipse/offline/aem/www.silabs.com/documents/public/reference-manuals/Schematics and assembly diagrams can be found in:
/Applications/Simplicity\ Studio.app/Contents/Eclipse/offline/hwtools/boards